There is a hard rule in the flooring industry: High-gloss paint shows everything.
If your garage floor is pitted, wavy, or rough like a moonscape, applying a shiny Epoxy Floor Paint will not hide those imperfections. It will highlight them. The light will catch every ripple and crater, leaving you with a floor that looks cheap and unprofessional.
Paint coats the profile; it does not change it.
If you want that "glass-like" showroom finish on an old, beaten-up slab, you can't just paint it. You need to resurface it first. You need a Self-Levelling Compound (SLC).
What is Self-Levelling Compound?
SLC is not just "runny concrete." It is a polymer-modified cement designed to flow like liquid batter. It seeks its own level, filling in low spots and burying rough aggregate to create a perfectly flat, smooth canvas.
However, the name is deceptive. It does not do all the work for you. If you just pour it and walk away, you will end up with a disaster.
Rule #1: You Must Prime (Non-Negotiable)
The biggest mistake DIYers make with floor levelling compound is pouring it directly onto bare concrete.
Old concrete is thirsty. If you pour wet SLC onto it, the slab sucks the water out of the mix instantly. This stops the flow and causes the leveller to seize up and crack before it flattens out.
-
The Fix: You must seal the substrate first with a dedicated primer (usually SBR or acrylic based, sometimes epoxy). This prevents suction and ensures the SLC bonds to the floor, not just the dust.
Rule #2: Do Not "Eyeball" the Water
When mixing concrete, you can usually judge the consistency by eye. With SLC, you cannot.
-
Too little water: It won't flow. It will sit there in a lump.
-
Too much water: The chemistry breaks. The heavy sand sinks to the bottom, and a weak, milky water layer rises to the top. When it dries, the surface will be soft and dusty, and your Industrial Floor Paint will peel right off it.
Follow the bag instructions exactly. Measure the water. Do not guess.
Rule #3: The Tool You Cannot Skip
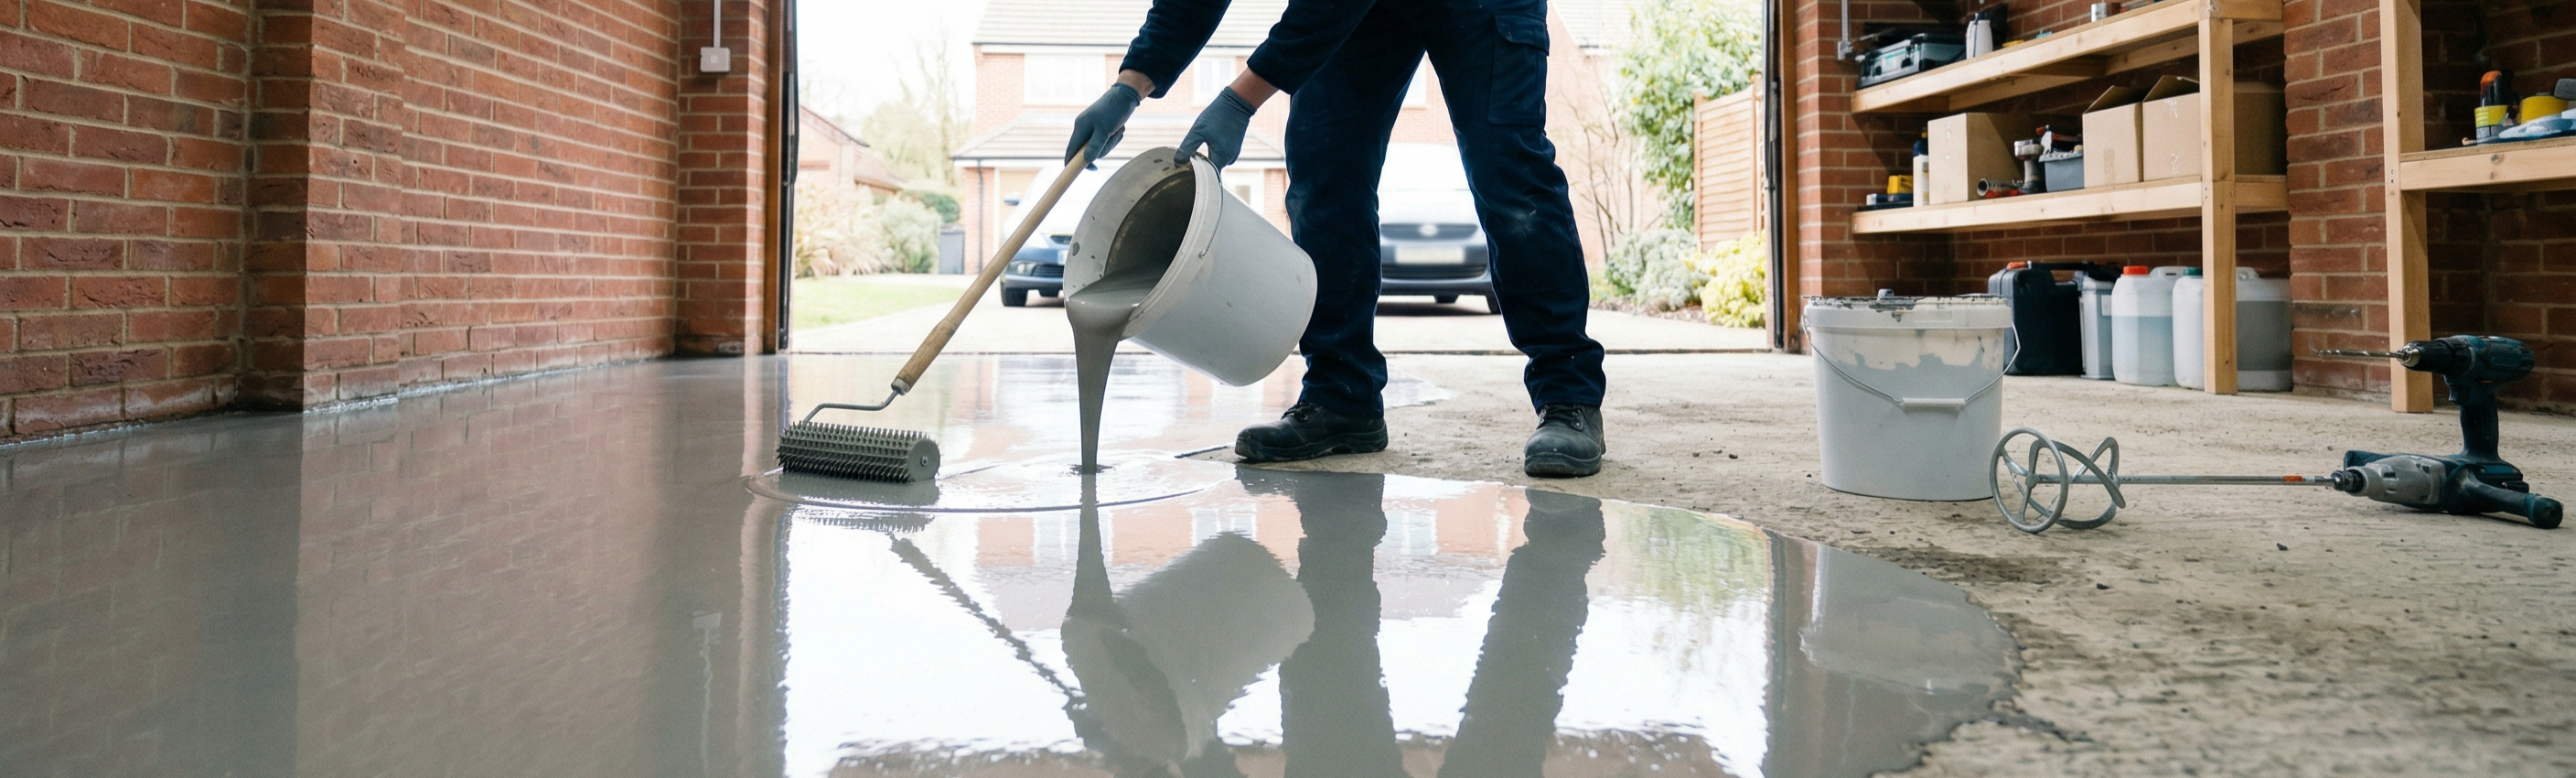
You cannot lay SLC with a trowel alone. You need a Spiked Roller.
As you mix the powder, you whip thousands of tiny air bubbles into the liquid. If you leave them, they will rise to the surface as the floor hardens, leaving you with a floor covered in tiny pinholes.
-
The Technique: Once you have poured and raked the compound into place, roll the spiked roller through it immediately. This pops the bubbles and helps blend the different pours together for a seamless finish.
Can I Paint Over Self-Levelling Compound?
Yes, but you have to be careful. SLCs generally will require additional treatments before they are ready to be primed and painted.
-
Wait: Most compounds are "walkable" in 4 hours but hold moisture for days. Do not start any prep work until the SLC is fully cured.
-
Etch: We always recommend that floors finished in a self levelling compound should be etched before they are primed or painted. This ensures that the substrate has sufficient pores for the primer and paint to successfully bond.
-
Prime: Because the new surface is porous, you must apply a Polyurethane Primer or Epoxy Primer before your topcoat. If you skip this, the SLC will suck the resin out of your paint, leaving a patchy, dull finish.
Conclusion
Resurfacing a garage floor is the only way to turn a rough, 50-year-old slab into a modern showroom floor.
It adds a day to your project timeline, but it adds ten years to the look of the floor. Get the surface flat first, and the painting becomes the easy part.
Share:
Mechanical Keying: Preparing Power-Floated Concrete
Sanding vs. Grinding: Preparing Previously Painted Concrete